
1. You will need: Paper/cardboard in your favourite colour (mine isn't red, but it goes well with the interior here so I had to compromise). I preferred cardboard, because the roses come out better defined, but ordinary paper would also do the trick; a twig or two; a pencil, liner, scissors, some soft poster stickers and a small vase.
2. Cut out squares, depending on the size you want your roses to be. I didn't want mine to have the exact same shape - for the biggest one I used a 13x13 cm cardboard and for the smallest - 3x3 cm.
3. Draw a spiral on the cardboard square. It doesn't have to be perfect - just to give you an idea of where to cut. Make sure you have a little circle in the middle, this is where the stickers will hold the whole thing. Let's call this circle Mr. C, he's quite important!
4 and 5. Following the line you've drawn, cut the cardboard into a spiral. If you have zigzag shape scissors, don't hesitate to use them here! It would look even cuter! When you're finished with the cutting, take the end of the spiral and start rolling in towards the center. Roll until you hit the little circle we've left in the middle (Mr.C!) and then let loose. There you have it!
6 and 7. If you cannot find soft poster stickers, you could use two-sided duct tape as well. I prefer stickers, because they are like paste and hold the cardboard well. Put one sticker on the inner side of Mr.C and one on the back side. (He likes to stay warm.) Then adjust any imperfections while the stickers are still soft.
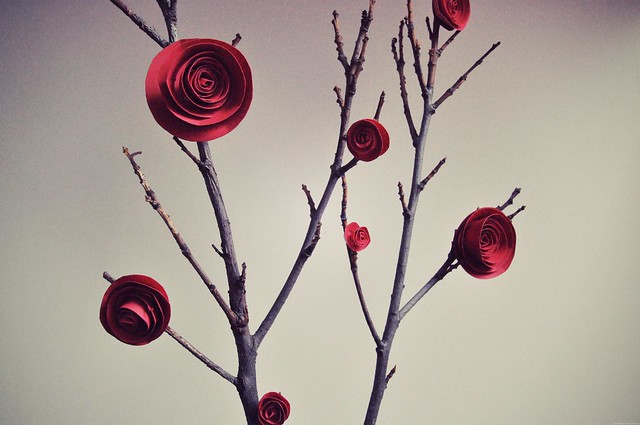
8. Plan how many roses you wish to have (mine are nine) and make consistent spacing. Then attach the roses to the twig and ta-da! You're done! Now all you have to do is put the bouquet in a cute vase and find a place for it :)

That's, like, super cool! :) Decorating ftw!
ReplyDelete~
this is adorable! i'm gonna try this
ReplyDelete~niki <3
http://nikiisyoungandimmortal.blogspot.com/
This is so simple and cute and sweet! I love it :) very elegant
ReplyDeletexo
http://kittysnooks.blogspot.com/
There great, even though roses are by far not my favourite flower!
ReplyDeleteawwww that's so cuuuuute :)!
ReplyDeletethey are amazing.. i had tried with yellow. but these look more beautiful. I will try them.. i love art.. and must say the photosare very clear. the background is clean and simple
ReplyDeletelove
megha
http://meghafashionista.blogspot.com
That's so cute! :)
ReplyDeleteThese are beautiful! I want to make them for my bedroom! Thanks for this great DIY.
ReplyDeleteoh wooww! i love it! they're so pretty and festiveee!
ReplyDeletehahah saving this up for nxt valentines <3
xx
-S
http://www.gingerandlace.blogspot.com
Love this!!! Thanks for the tutorial!!!!
ReplyDeleteWow this is such a creative idea, love the finished product! It looks so pretty, great to brighten up a room!
ReplyDeleteThis is really impressive. I'm gonna try it, I think it really looks good in out living room, we don't have lots of decorations in our living room because we just want it simple and this would totally fit in =) thanks for sharing the tutorial!
ReplyDelete