Thursday, April 26, 2012

Pencil Picture Frame DIY


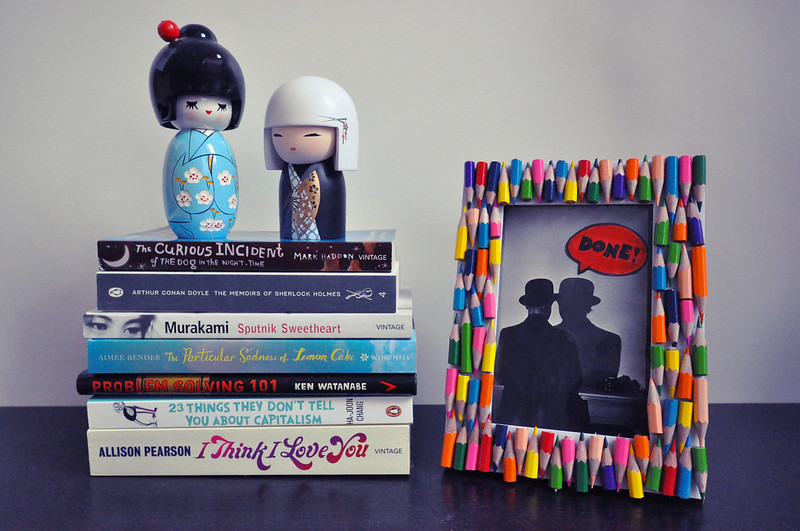
Here's a quick and simple way to pretty up an ordinary picture frame and add a little pop of colour to your place! Grab your old colouring pencils and join the fun!


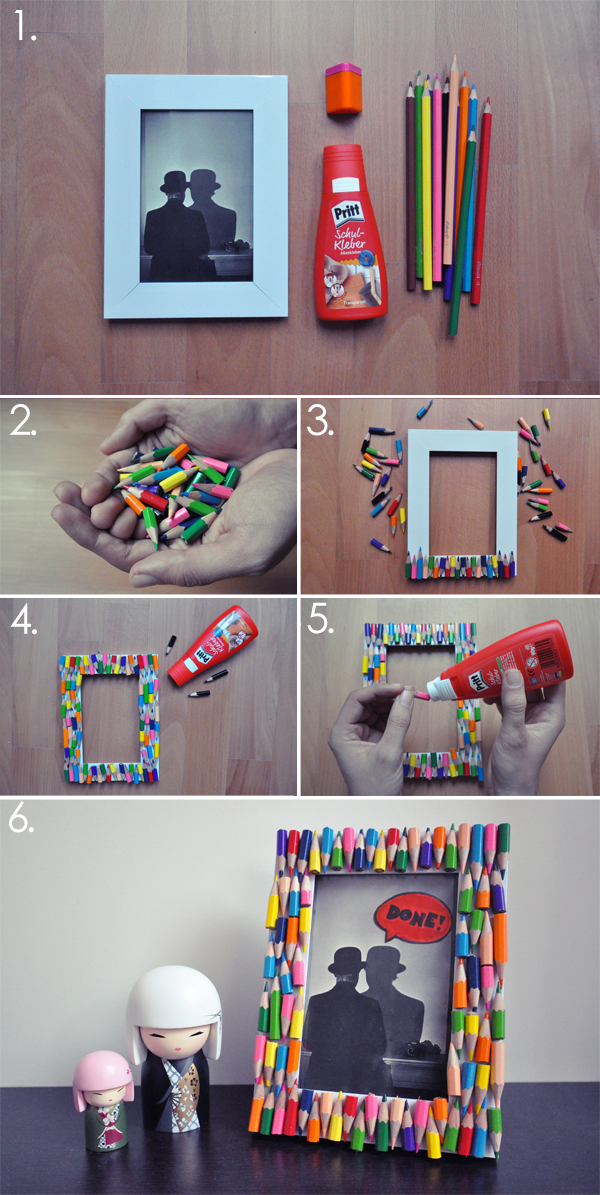
1. You will need: a plain picture frame (the wider - the better!), all-purpose glue, a set of colouring pencils, a sharpener and a knife or a small hand-saw to cut all the pencils with. 2. First off, we need to cut the pencils to smaller ones and sharpen every single piece. I used a kitchen knife for the job and it took me about an hour to cut the whole set of pencils and another half an hour to sharpen every piece. 3. Start arranging the little pencils on the frame without using any glue. That way you can always rearrange something you don't like, swap colours and check if you will need to cut a pencil with an exact length. 4. When you've arranged all the little pieces, make sure that the pencil-frame fit perfectly within your plain frame and there aren't any pencils slipping out. 5. Time for sticking! I don't recommend instant glue in this case, because it doesn't give you the freedom to move around the particles after sticking them. I chose a slowly drying glue, so I was able to play with the little pencils even after applying the glue and arrange them in a way that best covers the frame. (Note: round pencils would be harder to attach because of their shape! It is not impossible, of course, but it would take a lot more time.) Leave the frame aside for an hour or two for the glue to completely dry. 6. Put a favourite picture in the frame and we're done!
Have fun with this little project and be extremely careful when cutting the pencils! :)

Monday, April 23, 2012

Three to nine.


Wonderful things happen at three to nine in the evening.
Raspberry ice cream tastes better (yes, it is possible!). Singing under the shower sounds like a favourite song. The rain is warmer. The city smiles. Only at three to nine - at two to nine everything gets back to normal.

Sunday, April 15, 2012

Happy Easter!


The orthodox world celebrates Easter today.
Happy Easter!

Friday, April 13, 2012

Mother Nature

I am home and Dexter sleeps by my side. I listen to Moloko, I draw. It smells of lilies. I feel peaceful and ready for everything that is going to happen. Welcome, Spring.

Sunday, April 08, 2012

Taste of Happiness.


I am not a good cook. I mean, I try, I really try... but it's just not something that comes naturally. I always mess up recipes, experiment way too much, make huge messes and after all the trouble I end up with something that doesn't even count for a proper meal. Oh well... It's the effort that counts.
However, baking is something else. Me and my granny used to have this special tradition that made me fond of baking. Every Saturday I used to help her in the kitchen and we used to make the most delicious homemade cakes, cookies, pies and whatever you can think of. 
This weekend is very special for me and Lazar. We both have namedays, we are home, we are happy and I wanted to celebrate it with something I don't usually do. There's nothing better than the smell of cinnamon and freshly baked cookies to make a holiday even more special. My granny's recipe for honey cookies mixed with my own experiments for colour icing is the perfect weekend treat. This is, undoubtedly, the taste of happiness. You should try it yourselves! Here's the *super secret* recipe (I am giving it with the permission of my granny, I promise.)
For the cookies you will need:
2 eggs, 1 cup oil, 1 cup extra fine sugar, 1 cup honey, 3/4 teaspoon baking soda, 1 teaspoon cinnamon, about 1/2 kg flour, a pinch of love.
Mix the eggs, oil, sugar and honey with a mixer. Then add the baking soda and the cinnamon and 3-4 tablespoons flour. Beat until dough forms, adding 1-2 tablespoon flour now and then. Use a wooden spoon (or your hands) to mix everything better. The dough should be soft and easy to work with - perfect for cut-out forms (stars are my favourite!).


I didn't use a baking sheet and I didn't have problems with sticky cookies. But if you feel unsure, you can arrange the cut-out figures on a baking sheet and bake at 180 for about 10 minutes. Piece of cake. And then it's time for the icing - which is the most exciting part!
For the icing you will need:
2 egg whites, 2 cups extra fine sugar and 3-4 drops of lemon juice, cooking dye, sugar sprinkles. 
Beat the egg whites in a bowl until soft peaks form. Keep the mixer going and add the sugar and lemon juice. Beat on high for about 6-7 minutes until the mixture turns thick and cool. I used powder dye and put just a pinch of the three colours in three different cups and then added some of the white icing. I mixed blue and red dye for the purple butterflies and added just a little bit of orange in the yellow dye for a deeper colour. The little ducks I decorated with sugar markers in red and brown. These honey cookies are deeeelicous and are perfect for a big party or for a little home celebration. Give them a try! :)