Showing posts with label home decor. Show all posts

Sunday, September 28, 2014

Night Stand Makeover


One fine Saturday afternoon, as I was walking home after a long expedition around London (a casual weekend activity) I found... a night stand. 
I have an unquenchable need to give life to old furniture and - pretty much - repaint everything in black and white patterns... so I couldn't just leave an abandoned night stand in need. Even if it was exceptionally boring-looking.
So I invited it home.
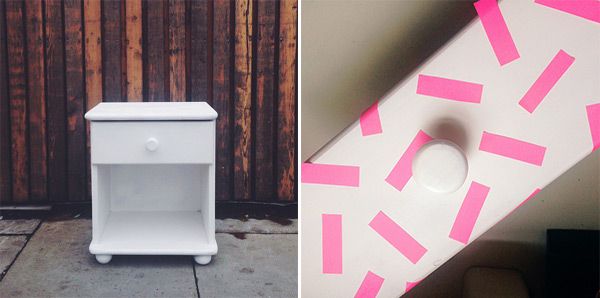

I spray-painted the night stand in white and let it dry completely for a couple of hours. I used black acrylic paint for the patterns and some paper tape for the reversed patterns on the drawer. And it was no longer exceptionally boring-looking. 
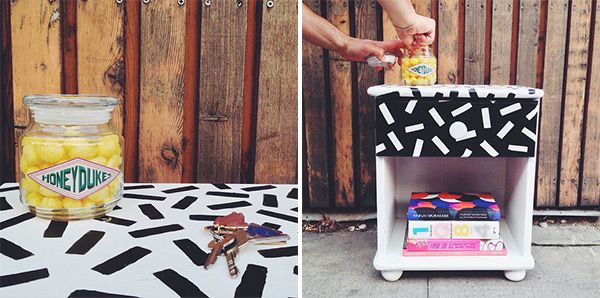

Mind you, the place you see in the pictures is not how my room looks like. Only showing you the night stand in his... so to say... natural habitat. I can assure you it is now in my room, keeping all my books and art supplies and Honeydukes sweets safe. 
By the way, speaking of Honeydukes... Sherbet lemons are the best.

Wednesday, June 04, 2014

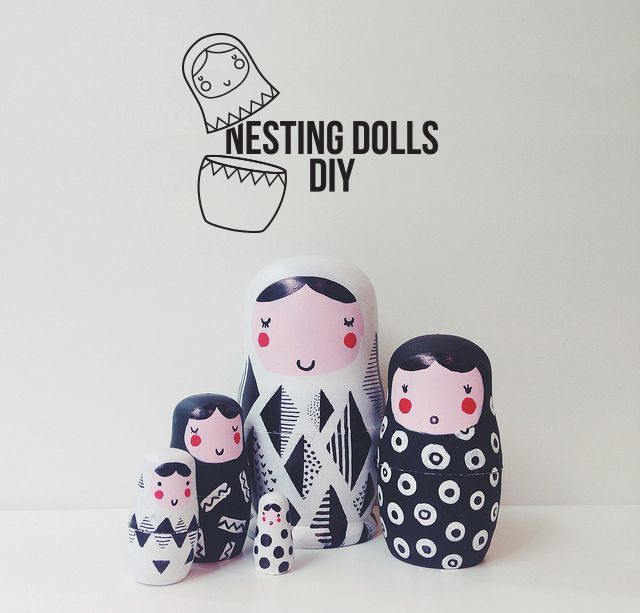
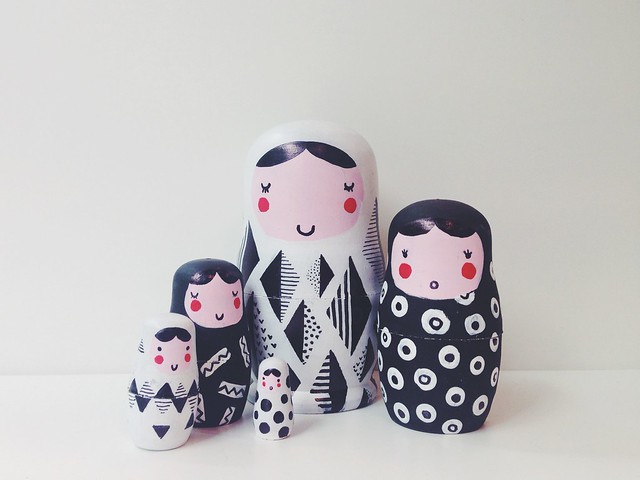
Geometric pattern nesting dolls DIY


June is here, summer is almost here and I am finally here, too (wow - it's been a while, huh?) with a couple of fresh new illustrations, a bunch of fun DIYs and a delicious recipe or two out of my red lunchbox. June is going to be great, I promise you that. And because June is great and I feel great and everything feels like rainbows and sunshine - I decorated a set of nesting dolls and I'm going to tell you aaaall about it.
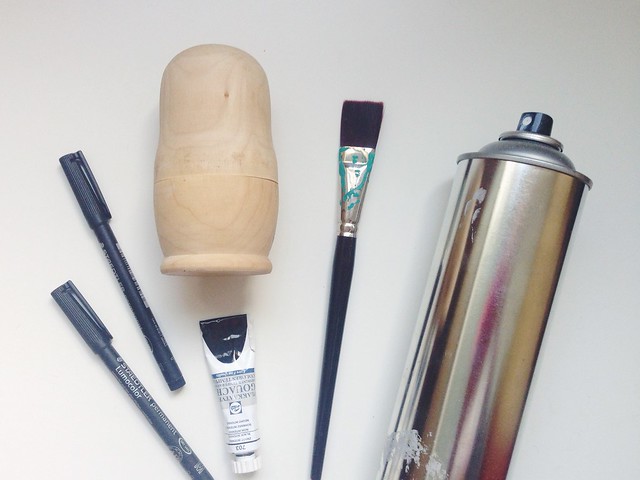
I love matrioshka dolls and I loooove geometric patterns in black and white - it was about time to combine the two. For this project you are only going to need acrylic paint, permanent markers and a set of blank nesting dolls.
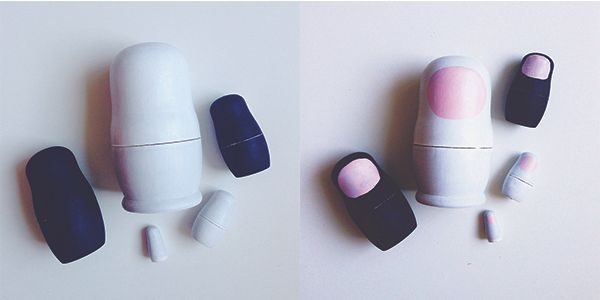
Start with covering your dolls in your primer colour. I used white spray paint at first but it doesn't really work well on wood, let me tell you this. Or at least mine didn't. So I applied generous coats of white and black acrylic paint to my dolls and let them dry for a couple of hours. I used pale pink to paint the faces and a pinch of red for the cheeks.
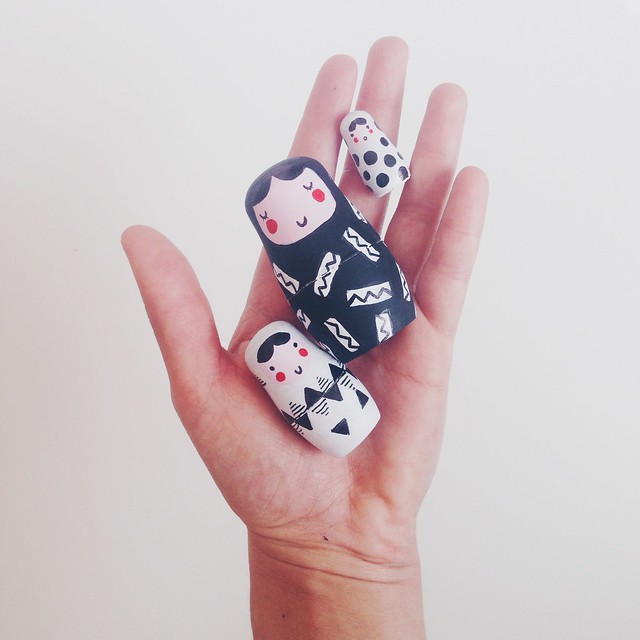
I find markers to be a lot easier to work with than brushes, so I used permanent black markers to draw all the cute patterns on my matrioshka dolls. If you want perfect straight lines and forms - use the help of some masking tape. Drawing patterns is always lots of fun - the moment I finished decorating my dolls I wished I had a couple more blank sets to work on.
Go crazy with colours and shapes or win a couple of extra points in my book by keeping everything in black and white. Either way - have fun creating your own set of customised nesting dolls!


Sunday, April 27, 2014

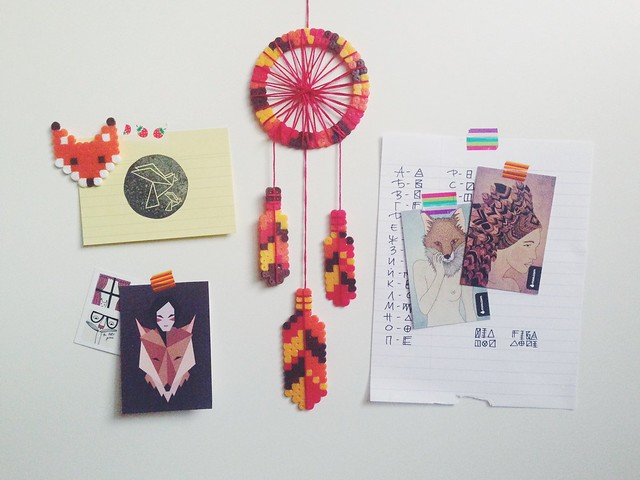
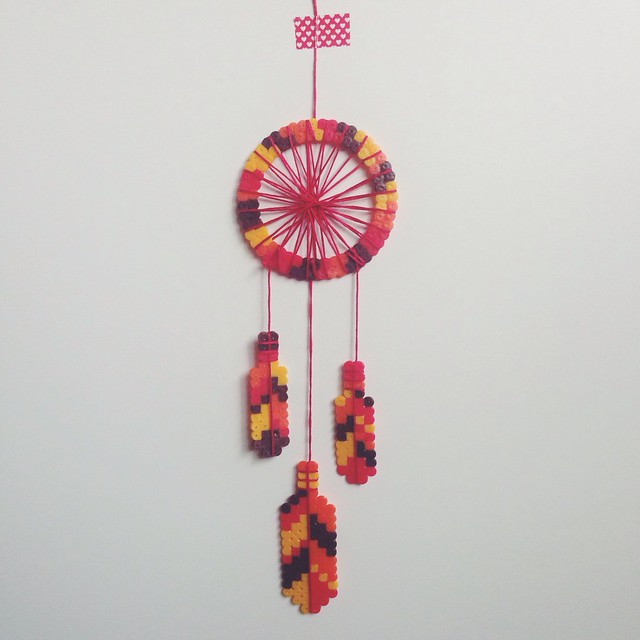
Perler Bead Dreamcatcher DIY


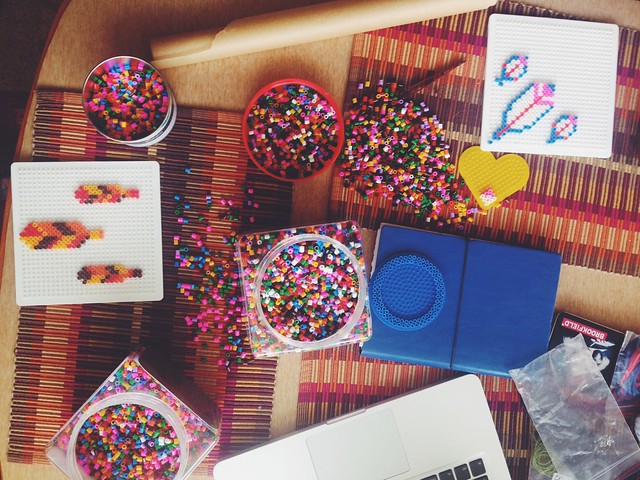
I have a giant jar full of perler beads. Mon has one, too. Picking the project for our next craft Saturday wasn't exactly difficult. 


Craft days mean good music, good food, quality fun, colourful messes and - of course - crafts. The music Mon picked was, well... weird (no offence here!), the lunch we had was nice and the snacks were the usual almost healthy. The idea of a bead dreamcatcher was probably a little too ambitious, but we had lots of fun and ended up with something that - hopefully - resembles a dreamcatcher. At least a tiny bit.

Оur only problem was that we had two giant jars of perler beads and not one tiny bead in a fancy colour. But oh well. We work with what we have. This project will look a lot nicer if you have perler beads in your favourite colours, but if not - brown, yellow, orange and red is not such a bad combination, is it? You could always say that you're going for that native look. 


Dreamcatchers are said to catch and hold bad dreams and energy and make them disappear into the spider web across the hoop. The web lets all good dreams and spirits pass through - they slide down the feathers to the sleeper. I am not sure if this works for perler bead dreamcatchers, but we did everything almost in a spiritual manner so it wouldn't be a surprise if our dreamcatcher truly has magical powers.
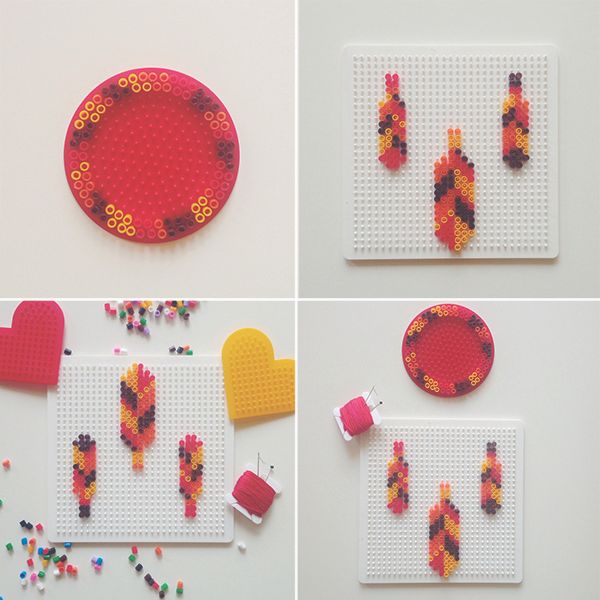
We made a hoop and three super simple feathers (since our circle pegboard was only this big we had to make tiny feathers as well to keep everything proportional... which didn't let us go crazy with the designs) аnd used red thread for the web. It came out a little too small to hang over your bed, but it's the perfect size for your inspiration board.
Who knows, it might catch a good idea or two? :)

Monday, February 17, 2014

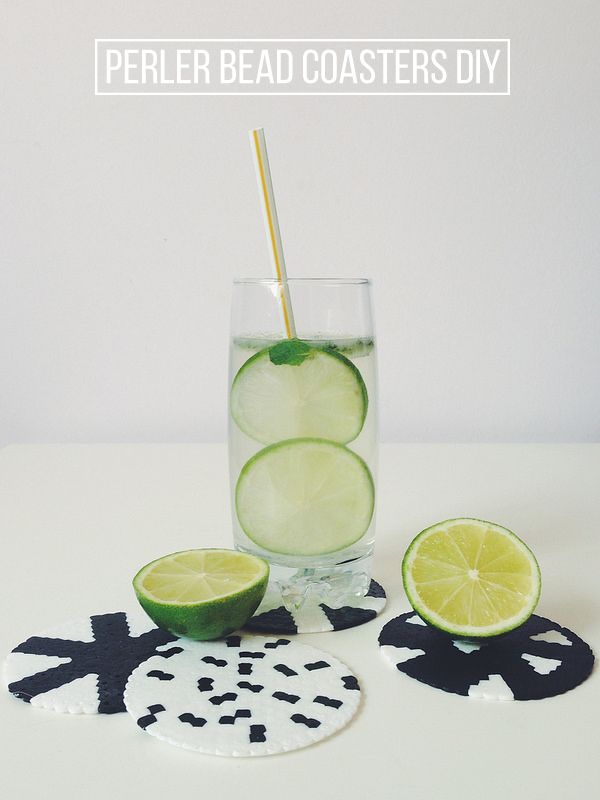
Perler Bead Coasters DIY


I didn't know how they were called. I didn't know where to find them. I only knew that they were super fun and that, well... I needed them badly. And as all good things in life, I discovered them accidentally - and couldn't believe my luck. I've been playing with them ever since.
And by them I mean perler beads. You might remember playing with them as a kid. Мy best friend introduced them to me when we were in high school and we used to spend sleepless nights making ridiculous jewellery that we loved but actually never wore. Or - you might still be playing with them secretly? At least I do - not so secretly, though.
Perler beads are a lot of fun. I might be hooked. I might have written a whole list of things I'd like to make out of them. I might have used half a jar of in one day. Dexter might have eaten a bead or two out of curiosity. Don't try that at home. Dexter's a professional.


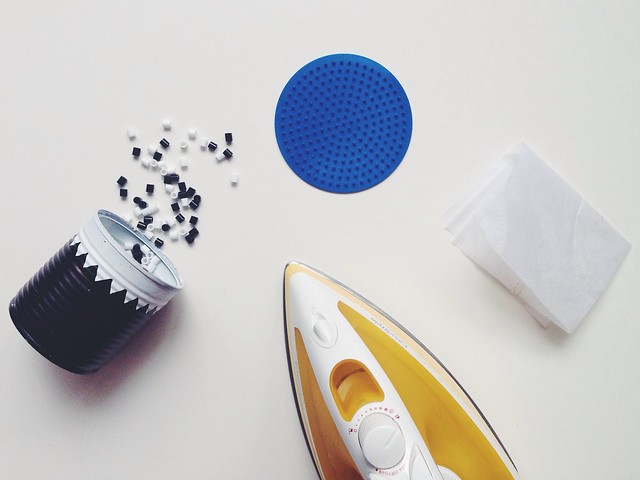
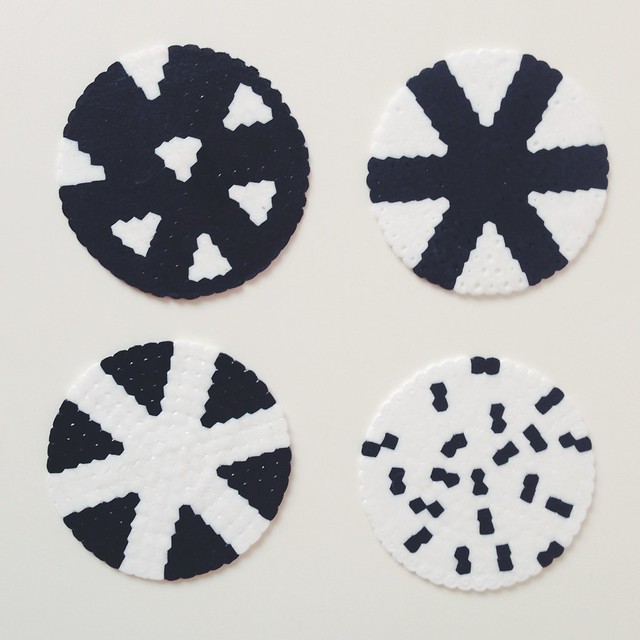
The supplies needed for a set of cute geometric coasters are simple: some beads in your favourite colours, a circle pegboard, parchment paper and an iron.


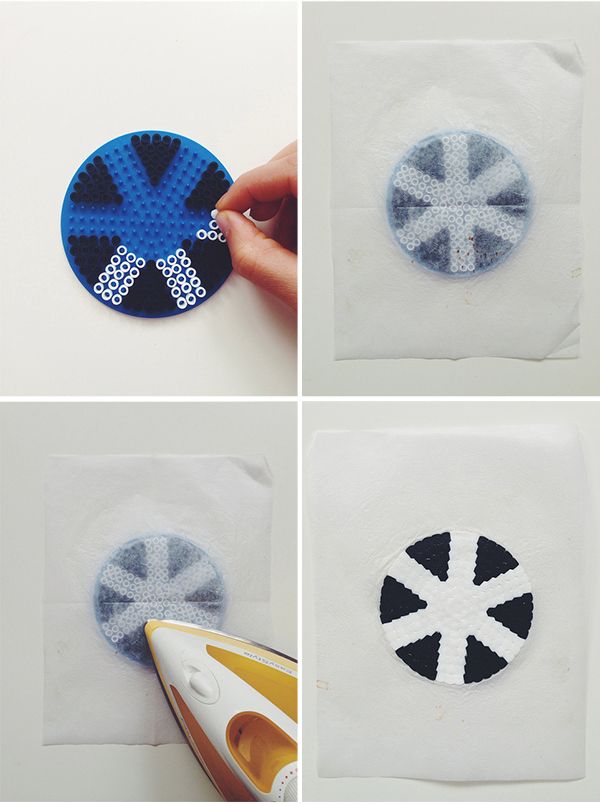
It's super easy - create a design you like, carefully cover it with parchment paper and iron it for a couple of seconds until the beads fuse together. Once you've done that you might want to put your coasters under a pile of heavy books (don't remove the parchment paper yet) just to make sure they stay completely flat.


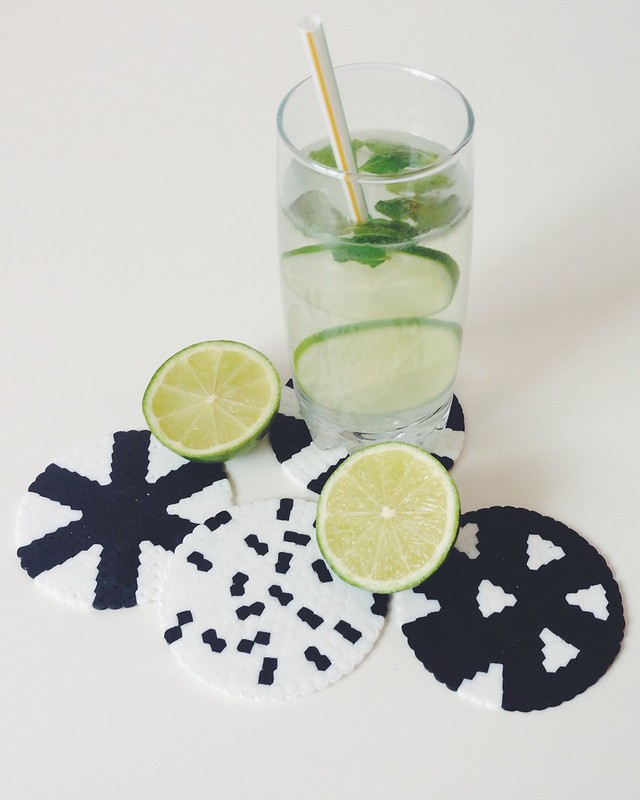
Half an hour later you have your perfectly flat super cute geometric coasters - now you only need a fancy drink to put on top. Homemade lemonade is always a good idea.


Sunday, December 15, 2013

Tin Can as Pencil Holder DIY


I've always kept my pencils, markers and brushes in used candles, old (and sometimes rusty, I admit) tin cans or plastic cups. It hasn't been a pleasant experience (especially with the latter) and it didn't exactly look that good either.
It was high time I got something fancier. I collected all old tin cans and decided to give them a total makeover.  It's great what a little paint here and a simple pattern there could do.


If you'd like to try this fun and easy project at home, you are only going to need  old and empty tin cans,  spray paint in your favourite colour (white in my case) and all-purpose paint or permanent markers for the patterns. 
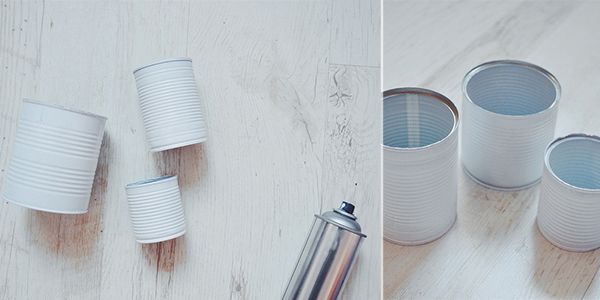
Start by applying a thin coat of paint to your cans. Spray paint is the better choice here, because it covers uneven surfaces more  easily. I needed three coats of paint to completely cover the metallic shine underneath and let the cans dry overnight.


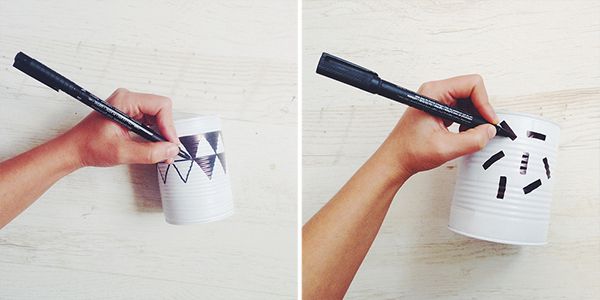
After the paint had completely dried, I used permanent black markers to draw simple patterns over. I decided to keep everything in black and white, inspired by Scandinavian design, but you can always be a little more adventurous than me and add a splash of colours here and there. 


Use your new almost-designer tin cans for storing everything. Now you can be organized on a whole new *a lot prettier* level. 
Have fun! 

Sunday, October 06, 2013

Paper lantern DIY


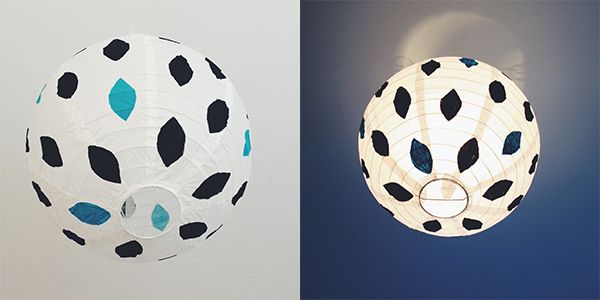
Here is a fun and quick way to turn your ordinary paper lantern into something much more fun. You only need an hour or two... and your imagination.
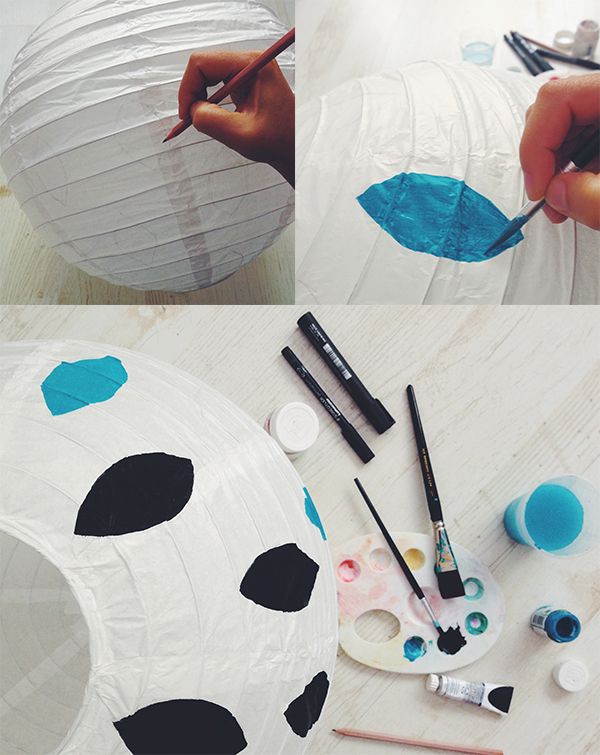
There are plenty of ways you could transform a paper lantern. You could apply vinyl stickers, transfer a favourite image using mod-podge or cut different shapes out of tissue paper and glue them on. I chose to draw a simple pattern using poster paint just because I rarely get to use paint and it's always so much fun. 
I started by marking the spacings and drawing light guidelines. Тhis makes the pattern a lot more consistent but it is a little tricky, because a pencil that is too sharp may damage the lantern. Try to find a softer pencil for the job - one with a rounded tip would be perfect.
The colouring is very easy and quick, because the paper from which the lantern is made is super thin and the paint dries off for seconds. I added two, sometimes three coats of paint to achieve a solid colour. 


Because the surface of the paper lantern is a bit wrinkled here and there, it's sometimes nearly impossible to come up with a perfect contour. I used a thicker brush for the colour filling and a thinner one for contouring. Don't get too serious about it, though. We go for pretty, not perfect.
An hour or two later (depending on the complexity of the pattern you have chosen) the basic paper lantern has magically turned into something much more interesting to look at. Play with shapes and colours to create the perfect lantern for your place and most importantly - have fun making it :)

Sunday, September 15, 2013

Fridge Magnets DIY


I'm a collector.
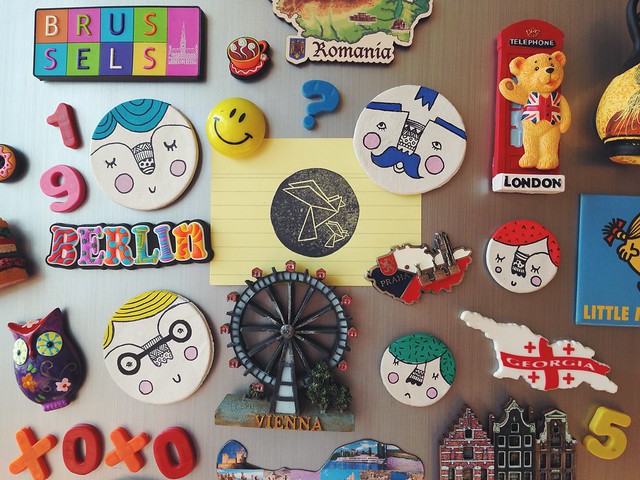
I collect too many things all at once: old coins, stickers, notes, magnets. Ah, magnets. I get a little excited every time I visit a new country just because I get to spend some time picking the most beautiful ones. And because I'm not planning a trip anytime soon - why not creating some handmade magnets?


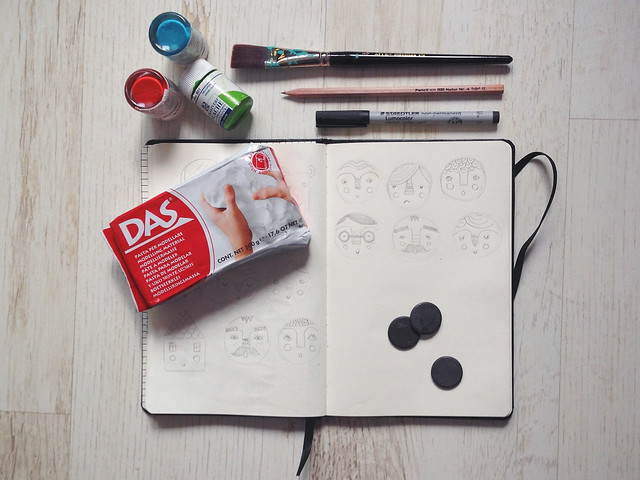
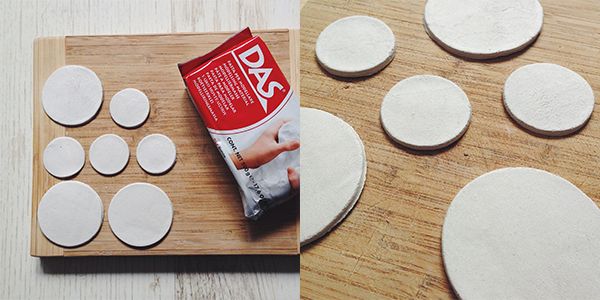
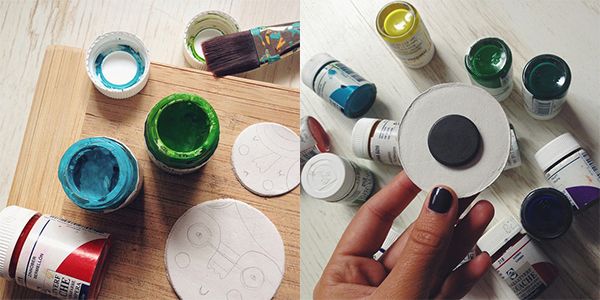
The materials needed are simple: easy-dry clay, paint and brushes, neodymium magnets, quick-dry glue, pencil and permanent markers for the final decoration.
First off, you need to decide what shape your magnets would be. I was lazy, I admit it, so I only cut a couple of circles out of a thin layer of clay and left them on a flat surface to dry overnight.


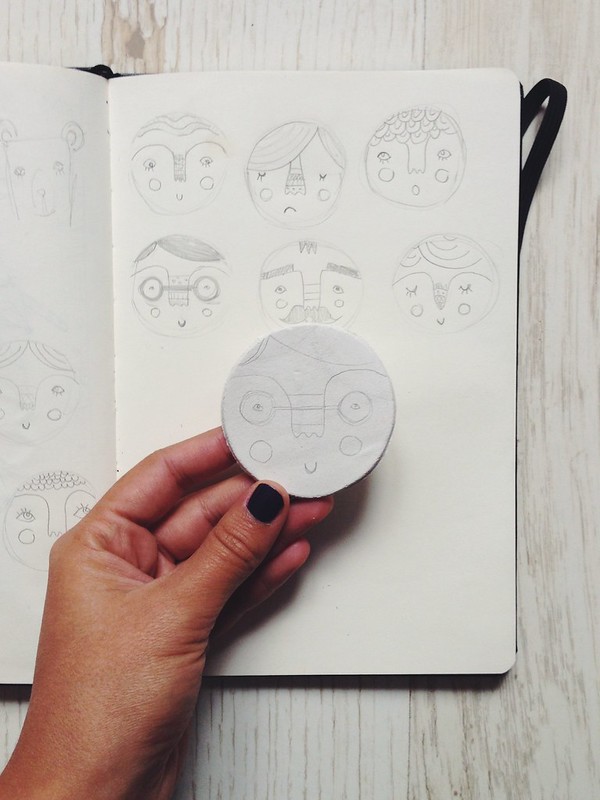
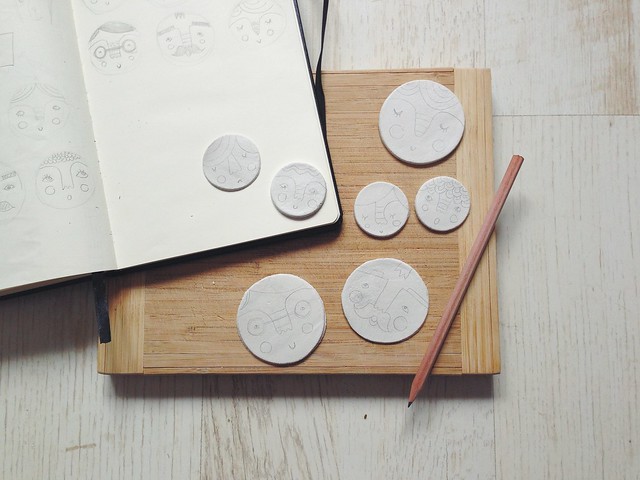
Once the clay had completely dried off, I started lightly sketching my designs on with a pencil. You might skip this step and start colouring right away - I just wanted to have some guides. If you use a pencil though - don't get too serious. Erasing it from the clay is a little difficult and leaves smudges on the surface that wouldn't look cool unless you cover them with colour.


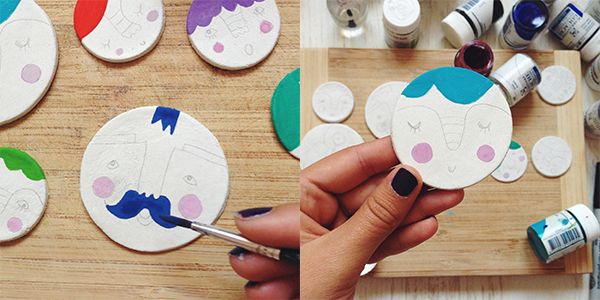
I used poster paint because it is permanent and because it hardly loses its color intensity over time. I am not sure if watercolours would be a good idea, since the clay is also water-based, but play around - it might work as well. Or you could try permanent colour markers.


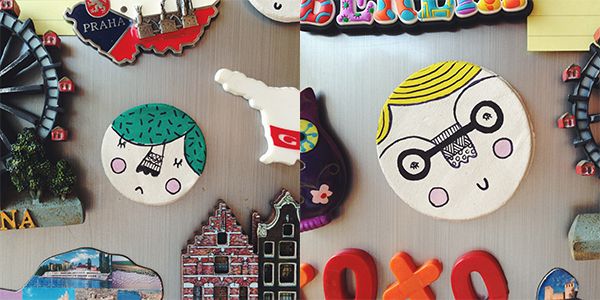
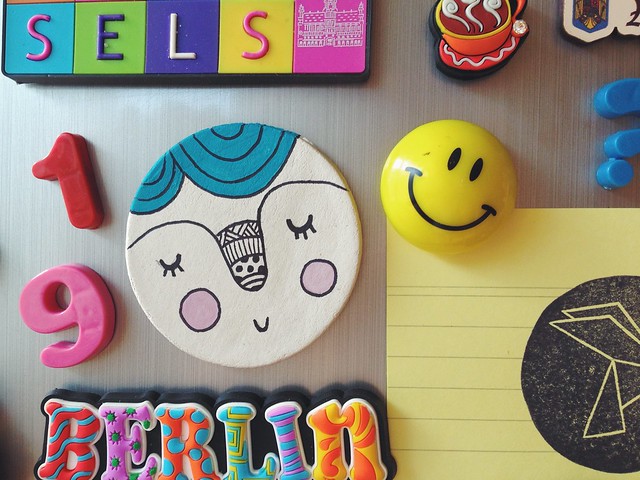
It takes a couple of minutes for the poster paint to dry, so by the time you've painted your last magnet (if you're making, like, more than three) the first one would be ready. You can then add outlines and textures using permanent markers. And only one more thing before your magnets are good to go - because, let's face it, they're not yet magnets. Take your easy-dry glue, dab a generous amount of it on the backside of your work and stick on the magnet. A couple of seconds later you're absolutely ready!


Have fun creating your own fridge magnets and don't forget to share them! :)

Saturday, August 11, 2012

Easy wall art DIY

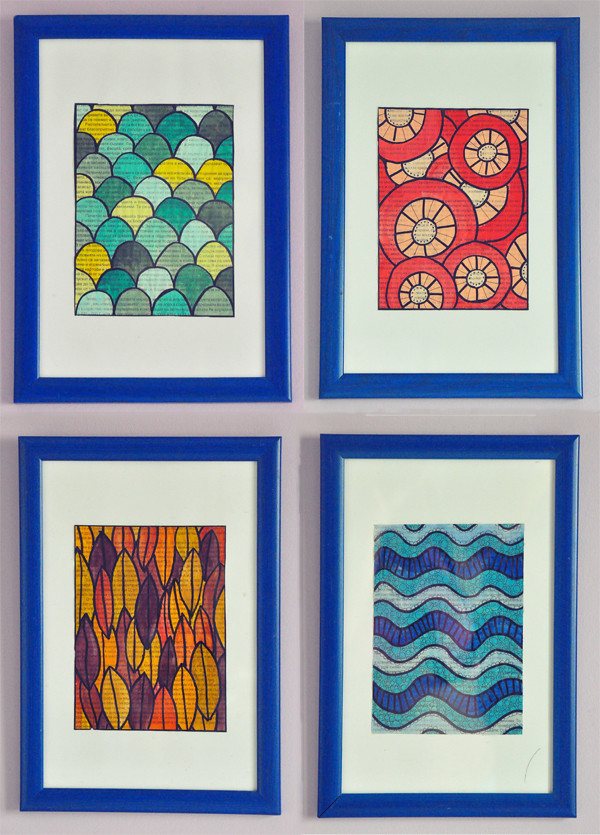
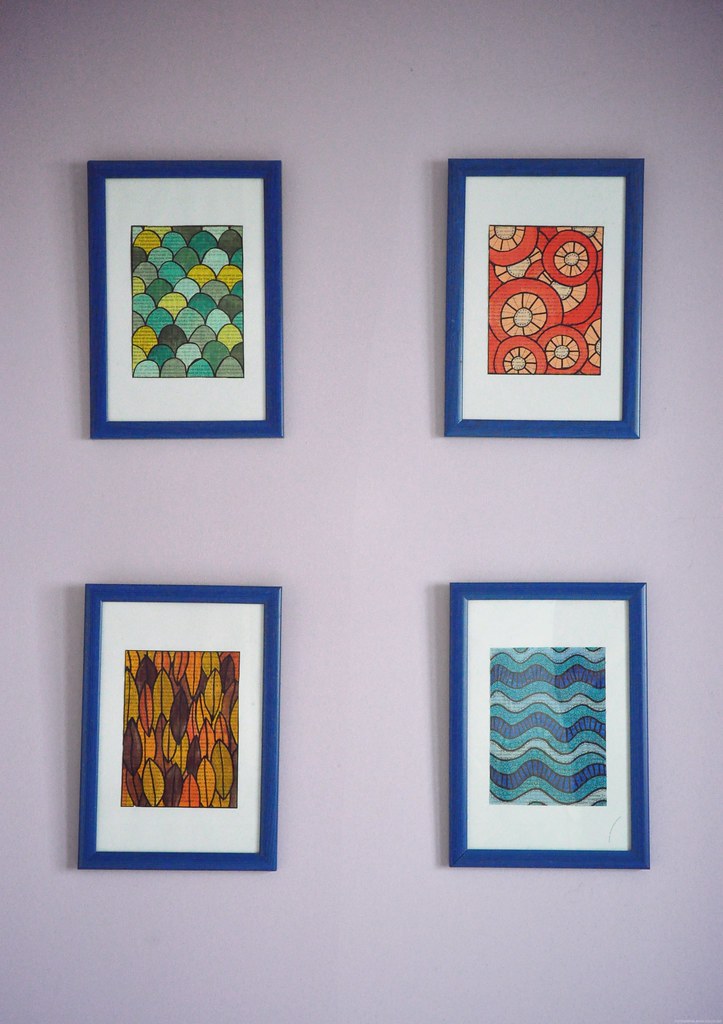
One of my favourite things to do is painting groupings. I am a huge fan of art walls and I love creating pieces that go well together and form a perfect set. 
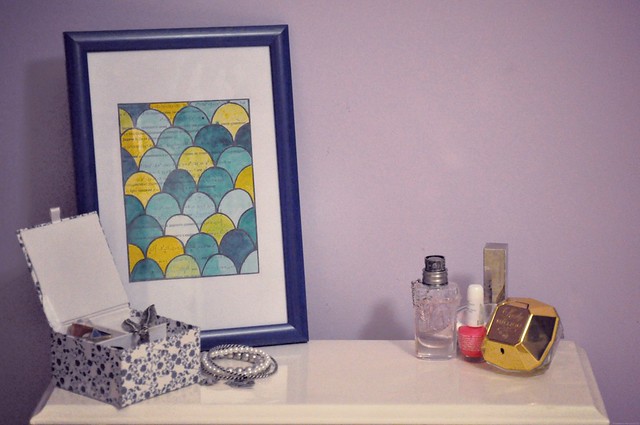
This one is really easy to make, it takes not more than an hour to finish and is also budget friendly! I've called it the "Four Seasons Set" and I'm going to show you how to make the Spring piece. All other ones need the exact same techniques and are just as easy to make.


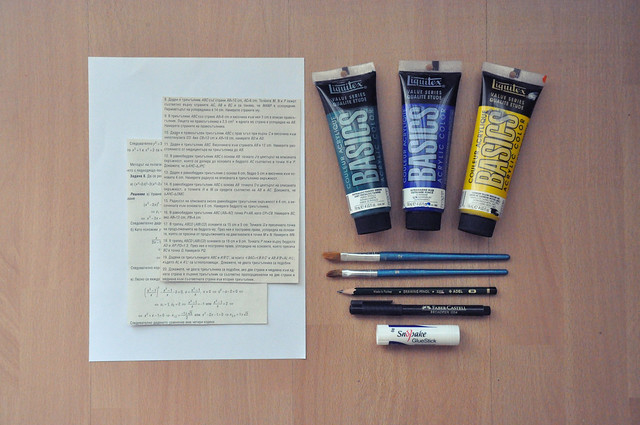
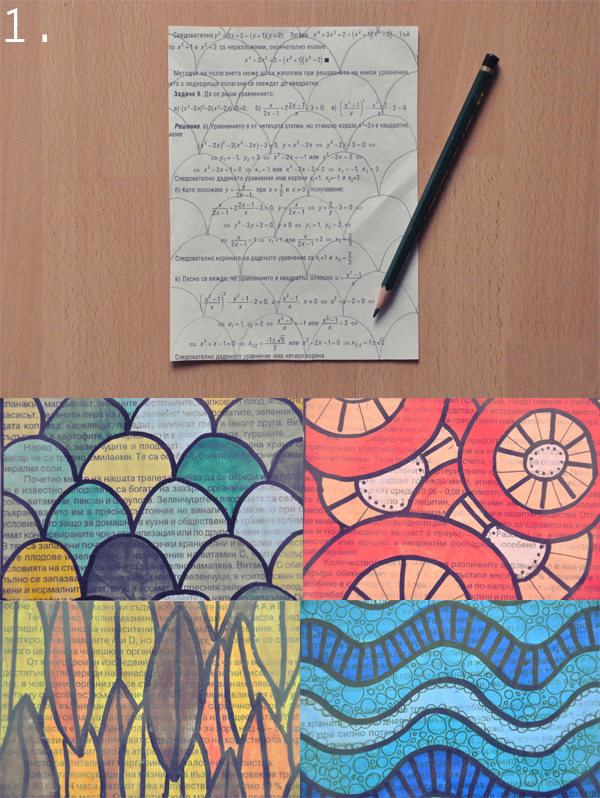
 For this project you are going to need a couple of old book pages (I've used an old recipe book and a math textbook - my revenge was full.), some ordinary A4 paper,  paint and brushes, a pencil and a black marker and some dry glue. You can pick whatever paint you have - both acrylics and watercolours would work just fine.

 
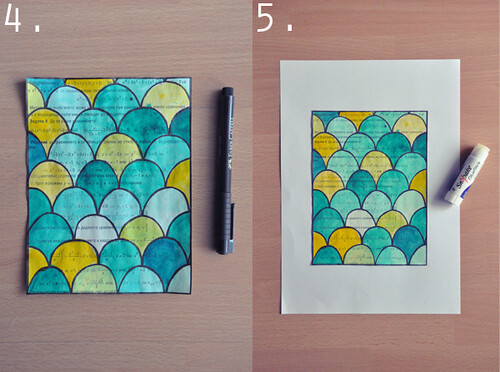
 1. First off, take your pencil and draw your favourite pattern on the book page. You can choose one of my patterns or create your own - either way - don't draw anything other than your pattern outlines. Adding texture will come later on.

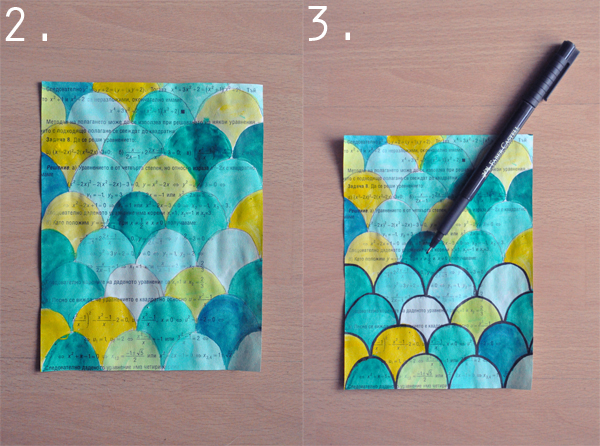
 2. Fill in with paint. Make sure not to apply layers that are too thick - you want to be able to see the writings. This will give your drawing texture and will make it more interesting. In my case - a person can look at an art piece and solve a math problem at the same time. Use similar colours and add white paint or more water to make them look paler. 3. When you're finished and your piece is completely dry, start overlining the pencil markings with the black marker. This will give it a more defined look and will make it pop out. You can then add different textures like little dots, thin lines or markings.


4. Once you're finished with the overlining, create a frame. If you don't have a steady hand, use a liner to create a thin frame around your drawing. Try to match the thickness of the lines for a better look. 5. Add dry glue on the back of your drawing and place it on the centre of the A4 paper. It is now ready to be framed!

Make two or three more to create a beautiful set and hang it on the wall, or use the framed drawing individually as an accent in your home. Have fun improving your place! :)
 

Saturday, June 30, 2012

Chalkboard quote of the day


What have you been up to lately?
I've been packing suitcases, sipping on enormous amounts of bubble tea (it's my elixir of life in these temperatures!) and writing summer to-do lists. I have a couple more days here in Vienna and then I am finally going back to Bulgaria! How exciting is that?
Now that all my exams are over and I have some spare time on my hands, I can fully enjoy silly things like midnight walks (with the secret mission of finding the best lemon cheesecake in town), long anime marathons and even some drawing projects.
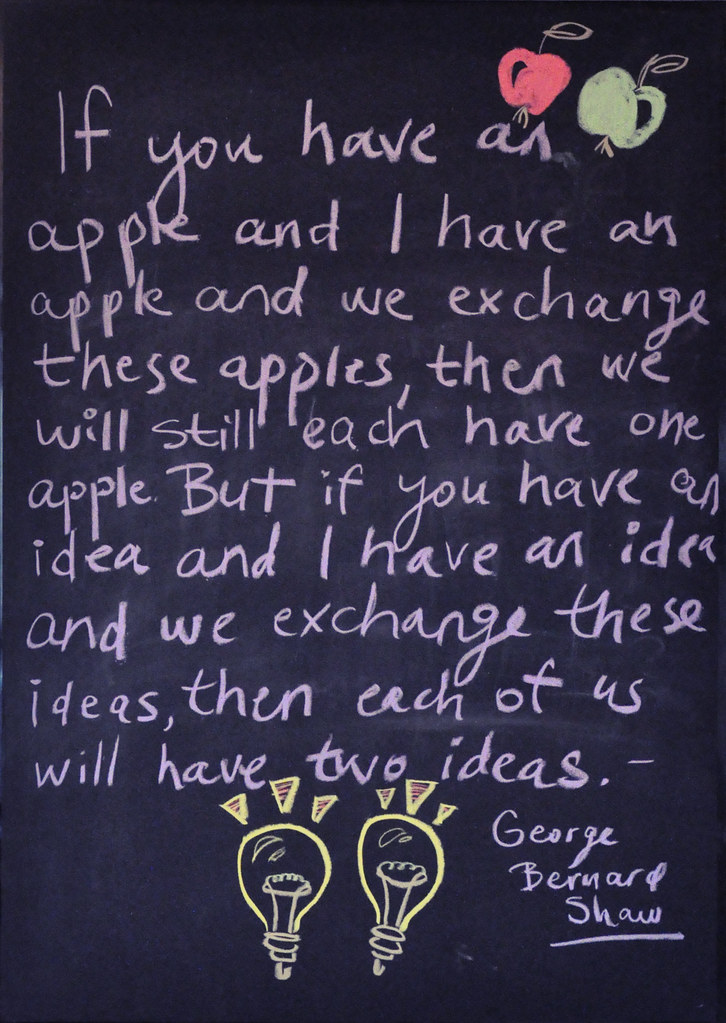
Speaking of projects, I decided it was high-time I gave our chalkboard a summer makeover. The last message had stayed there for far too long (with an addition of some extra difficult and long german words that I just could't remember). This George Bernard Shaw quote has been one of my most favourite ones lately. What about you - have you got a favourite quote at the moment?
~

Thursday, April 26, 2012

Pencil Picture Frame DIY


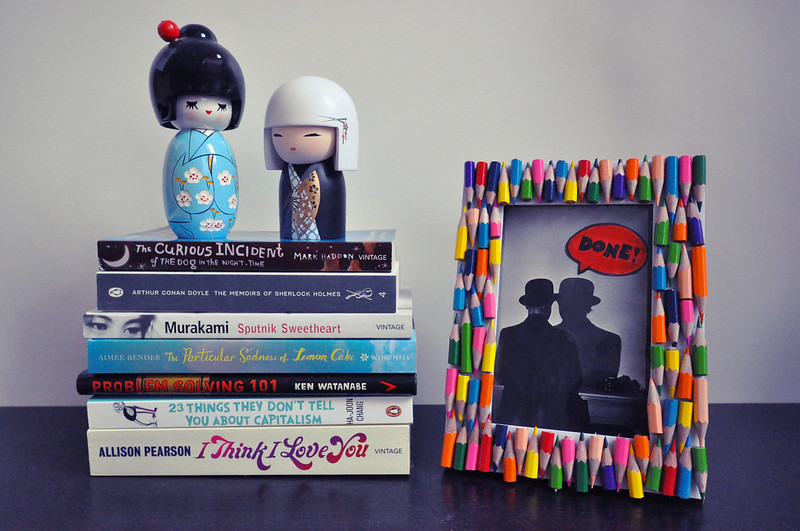
Here's a quick and simple way to pretty up an ordinary picture frame and add a little pop of colour to your place! Grab your old colouring pencils and join the fun!


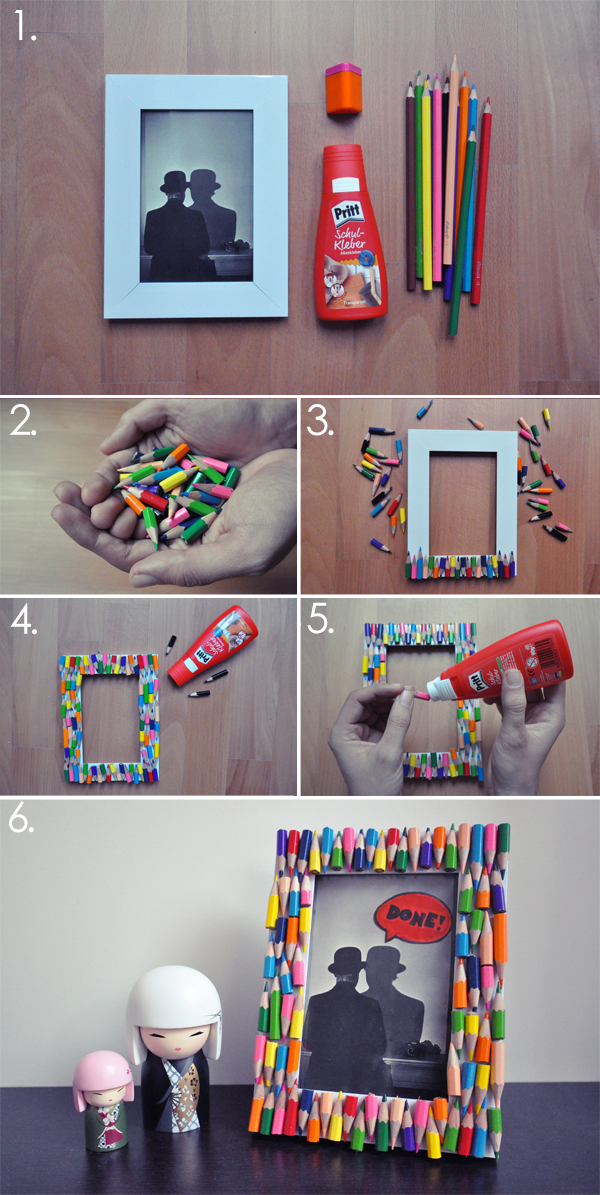
1. You will need: a plain picture frame (the wider - the better!), all-purpose glue, a set of colouring pencils, a sharpener and a knife or a small hand-saw to cut all the pencils with. 2. First off, we need to cut the pencils to smaller ones and sharpen every single piece. I used a kitchen knife for the job and it took me about an hour to cut the whole set of pencils and another half an hour to sharpen every piece. 3. Start arranging the little pencils on the frame without using any glue. That way you can always rearrange something you don't like, swap colours and check if you will need to cut a pencil with an exact length. 4. When you've arranged all the little pieces, make sure that the pencil-frame fit perfectly within your plain frame and there aren't any pencils slipping out. 5. Time for sticking! I don't recommend instant glue in this case, because it doesn't give you the freedom to move around the particles after sticking them. I chose a slowly drying glue, so I was able to play with the little pencils even after applying the glue and arrange them in a way that best covers the frame. (Note: round pencils would be harder to attach because of their shape! It is not impossible, of course, but it would take a lot more time.) Leave the frame aside for an hour or two for the glue to completely dry. 6. Put a favourite picture in the frame and we're done!
Have fun with this little project and be extremely careful when cutting the pencils! :)

Friday, March 02, 2012

Paper Rose Bouquet DIY

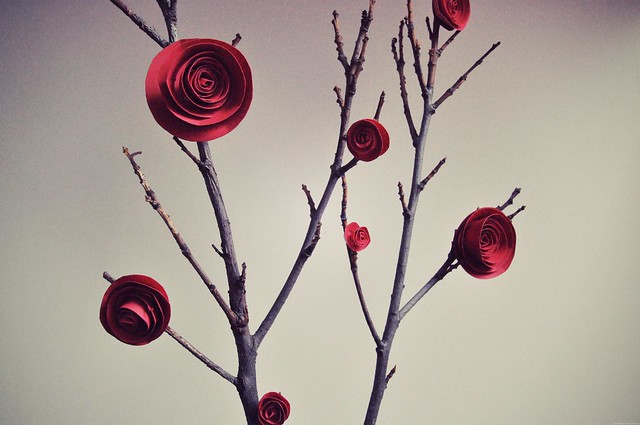
Sometimes you need the simplest and most ordinary materials to create something special. I am still in the process of decorating our (not-so-new-anymore) place and I am having so much fun! I am excited to share with you this super easy and cute paper rose bouquet diy!


1. You will need: Paper/cardboard in your favourite colour (mine isn't red, but it goes well with the interior here so I had to compromise). I preferred cardboard, because the roses come out better defined, but ordinary paper would also do the trick; a twig or two; a pencil, liner, scissors, some soft poster stickers and a small vase.
2. Cut out squares, depending on the size you want your roses to be. I didn't want mine to have the exact same shape - for the biggest one I used a 13x13 cm cardboard and for the smallest - 3x3 cm.
3. Draw a spiral on the cardboard square. It doesn't have to be perfect - just to give you an idea of where to cut. Make sure you have a little circle in the middle, this is where the stickers will hold the whole thing. Let's call this circle Mr. C, he's quite important!
4 and 5. Following the line you've drawn, cut the cardboard into a spiral. If you have zigzag shape scissors, don't hesitate to use them here! It would look even cuter! When you're finished with the cutting, take the end of the spiral and start rolling in towards the center. Roll until you hit the little circle we've left in the middle (Mr.C!) and then let loose. There you have it!
6 and 7. If you cannot find soft poster stickers, you could use two-sided duct tape as well. I prefer stickers, because they are like paste and hold the cardboard well. Put one sticker on the inner side of Mr.C and one on the back side. (He likes to stay warm.) Then adjust any imperfections while the stickers are still soft.
8. Plan how many roses you wish to have (mine are nine) and make consistent spacing. Then attach the roses to the twig and ta-da! You're done! Now all you have to do is put the bouquet in a cute vase and find a place for it :)